Fancy Ice Kits From Kickstarter
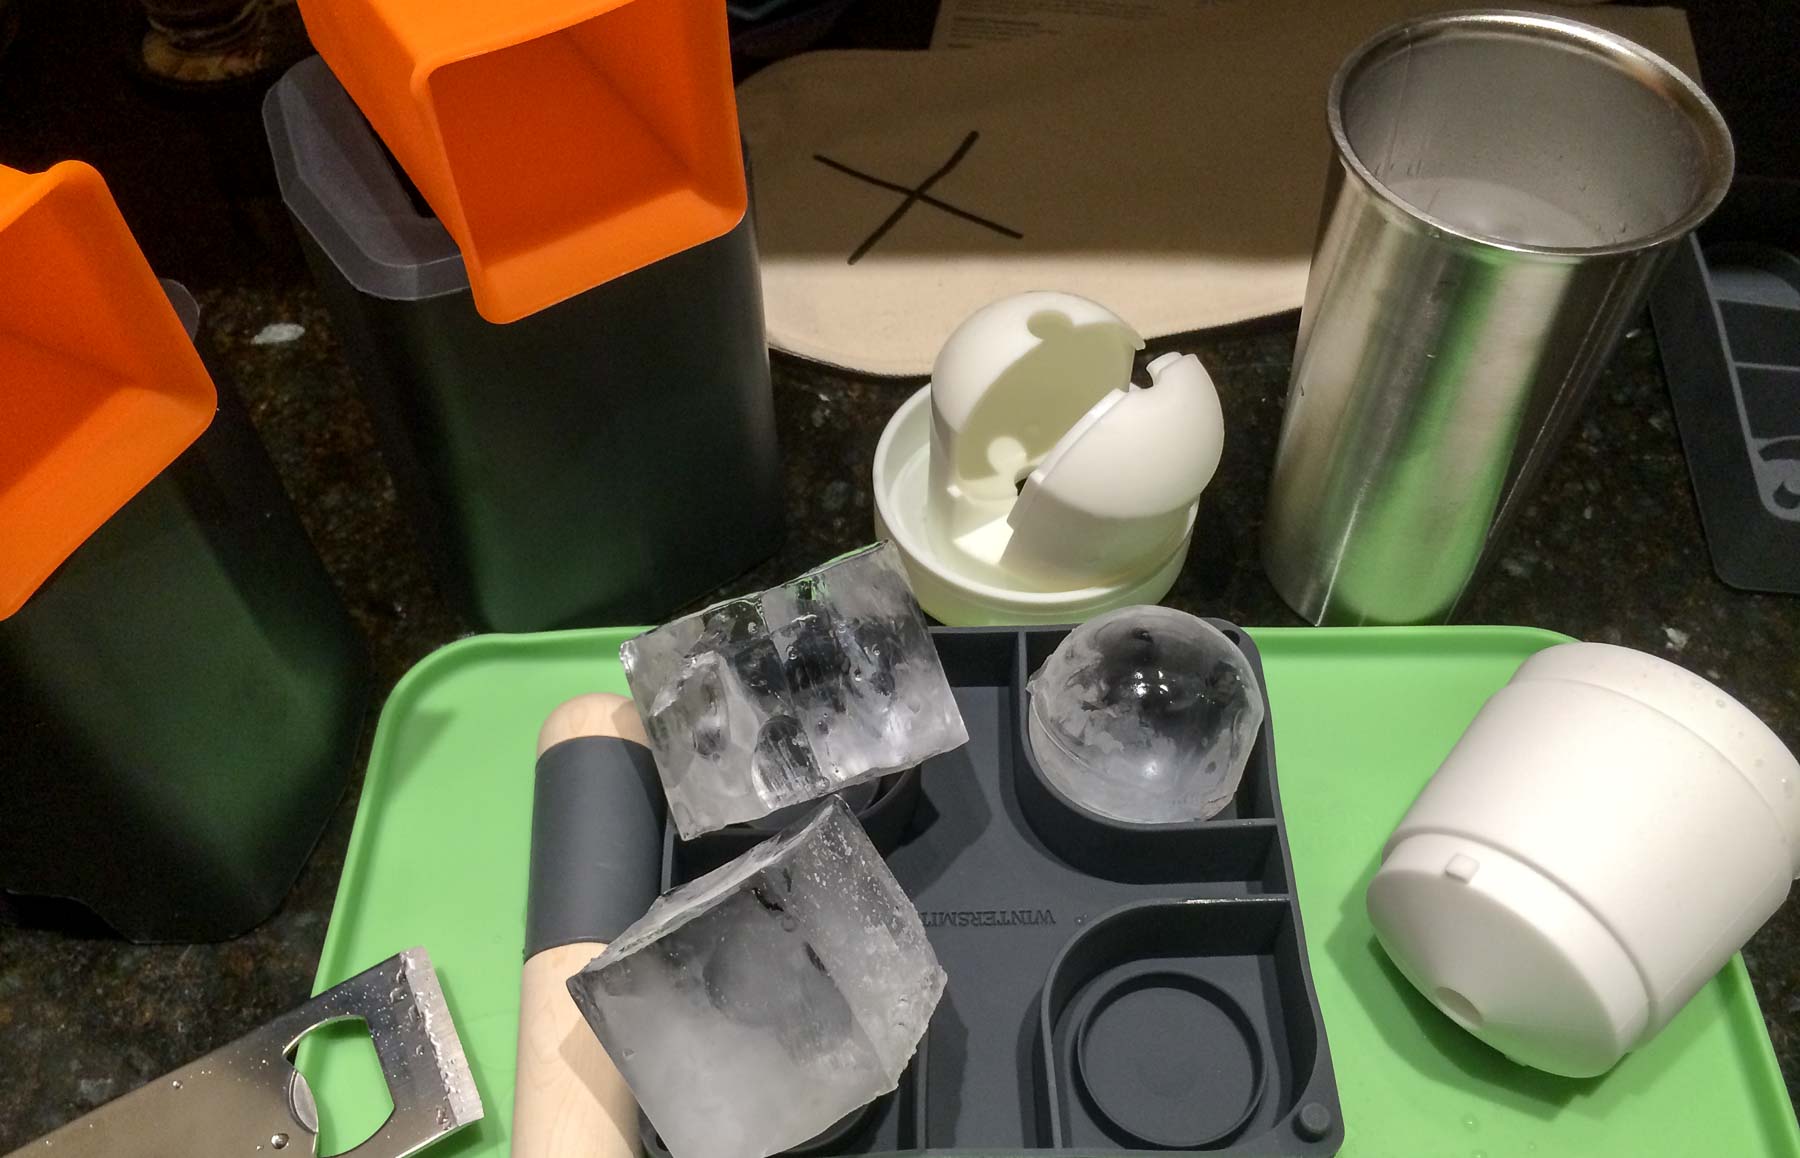
Left: Neat Ice Kit. Right: Wintersmiths Ice Baller. The ice appears slightly cloudy here from condensation, but it’s clear when properly installed in a drink.
Both the Neat Ice Kit (Kickstarter) and Wintersmiths Ice Baller (Kickstarter) have the same goal: make big, cool-looking, crystal-clear ice cubes at home for fancy cocktails.
Both work on the same principle. The cloudy flaws in ice cubes are in the part that freezes last — usually, that’s the middle. These products use insulated tubes that are only uninsulated on top, forcing the ice to freeze directionally (top to bottom). This pushes the cloudy flaws to the bottom, leaving the top clear. (It also makes a complete freeze extremely slow and inefficient, taking about 36 hours for me with both kits.)
The Wintersmiths kit is fancier: its insulator is double-walled stainless steel, and inside is a two-layer silicone mold to form the clear portion of the ice into a sphere with a little raised “W” symbol. After it’s frozen, you need to remove the mold from the metal cup (the bottom half of which is now full of cloudy ice), then remove the outer sleeve from the inner mold, then separate the inner mold halves, then finally remove your clear ice sphere.
This removal process is extremely, frustratingly difficult, especially separating the outer sleeve from the inner mold. This alone is enough to make me never want to use it again. I’ve now frozen about 6 spheres with different removal attempts, some involving strategic application of hot water, and it’s frustratingly difficult every time.
The Neat Ice Kit is a much simpler design: a rectangular foam surround with a silicone insert. After it’s frozen, you need to push the silicone sleeve out of the foam surround, then peel it down to access the ice rectangle. This takes substantial force, but it’s not nearly as difficult and frustrating as the Wintersmiths kit.
Split the ice rectangle in half (with the supplied tool) to get one cloudy and one clear cube, then throw away the rejected half, use it for crushed ice, or serve it to less-demanding drinkers.
Hops did not judge the cloudy half of the Neat Ice Kit’s rectangular output.
Casey’s review of the Neat Ice Kit is much more detailed.
After you go through the hassle, you do indeed get mostly-clear ice. None of my attempts so far with either have been perfectly clear, but they’ve been very close.
The Wintersmiths sphere is cooler-looking once you get past the more frustrating extraction process, but I actually find it clumsy in a glass: it bounces around weirdly and hits my nose a lot. The Neat Ice Kit’s cubes are much easier to extract and actually use in a drink.
The Neat kit is simpler, more practical, and easier to use. If you’re going to get one of these, get that one.
But in practice, I find both to be much bigger hassles than they’re worth. The Tovolo King cube tray and sphere molds produce cloudy-in-the-middle ice, but they also do it with far less time, freezer space, and effort.